


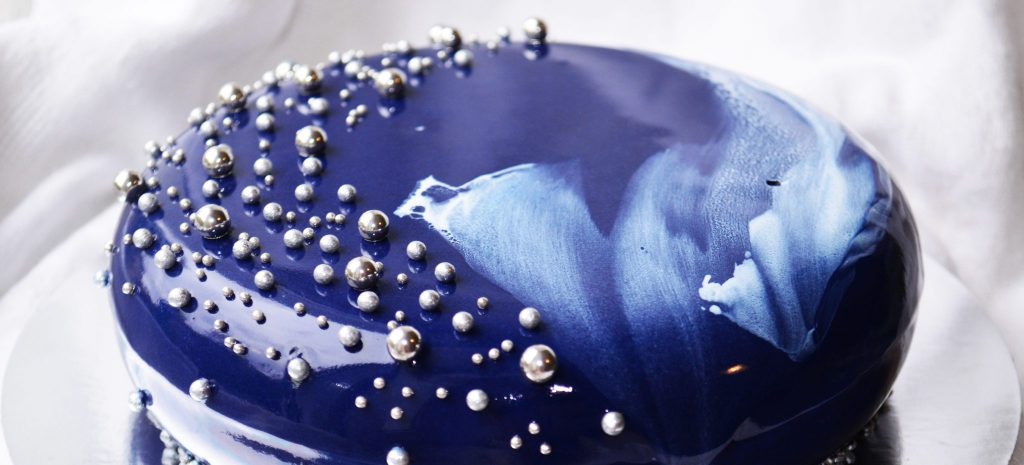
Mirror Mirror – The Glaze You Need to Add to Your Repertoire Right Now
Mirror glaze, it’s the amazing technique used to decorate mousse cakes, entremets, and pastries. Though it’s recently experienced a resurgence in popularity, mirror glaze is actually deeply rooted in classic French haute pastry. This is an easy to make and execute it’s the technique that will give your pastries a professional polish and take your pastry case or dessert menu to the next level.
Mirror Glaze
Yield: Makes enough glaze for a dozen 10-inch cakes.
Ingredients
700 grams white chocolate (24.5 ounces)
300 grams water (10.5 ounces)
600 grams sugar (21 ounces)
400 grams condensed milk (14 ounces)
1 tablespoon vanilla extract
38 grams powdered gelatin
food dye for colored mirror glaze (optional)
Instructions
The Day Before:
Start by making your cake(s) the day before. Mousse cakes are a popular choice as they freeze well and provide a smooth surface for your mirror glaze. Freeze your cake, at least overnight or longer if desired.
The Day Of:
Once your cake is ready, begin working on the mirror glaze. In a small bowl of cold water, bloom the gelatin. Do this by quickly sprinkling the gelatin over the surface of the water and whisking together until the mixture begins to thicken. Set the gelatin aside to fully coagulate while you prepare the glaze base.
In a medium heavy-bottomed saucepan bring the water, sugar, and condensed milk to a gentle simmer. Turn off the heat and stir the bloomed gelatin into the mixture stirring until completely incorporated. Pour the mixture through a fine-mesh sieve to remove any lumps left behind by the gelatin.
In a separate bowl measure out your white chocolate and combine with your heated milk mixture, allow to rest until the chocolate has melted fully. Stir together until everything is well incorporated and smooth. We recommend using an immersion blender for this job. Fully submerge the blender into the liquid to avoid introducing any air bubbles. Blend until smooth and homogenous. If dyeing your glaze, add food coloring now
Allow the mirror glaze to cool to 92F (33C), stirring periodically to prevent a film from forming on the surface. When the glaze is between 90F-94F (32C-34C) it is ready to be poured over the cake.
At this point you must be very careful not to introduce air bubbles into the glaze as they are hard to eradicate and each bubble must be manually popped using a pin or toothpick.
While your glaze is coming to temperature, prepare your cake(s) by unmolding them and checking them for any bumps or divots, these will show in the final product so it’s important to take a moment to smooth your cakes prior to glazing. Use an offset spatula to carefully smooth the surface of the cake and scrape away any imperfections. Line a large sheet pan with plastic wrap and place entremet rounds or cake tins turned upside down on the sheet pan. Just be sure to choose something smaller than your cake that will elevate it and allow the glaze to drip down
Glazing
When glazing a round cake start from the center and slowly pour the glaze in a circular motion, working your way out and allowing the glaze to run down the sides. Continue to pour until you completely cover the sides all the way around. Using a large offset spatula gently run your spatula along the top of the cake scraping off any excess glaze. Allow the glaze to drip off the cake for several minutes. Then using a spatula run it lightly around the bottom cutting off any drips that are forming around the base of the cake. Allow the glaze to rest on the cake for several more minutes before transferring it to a cake round and allowing it to chill in the refrigerator for at least an hour before serving or making any further decorations.


Write a Comment